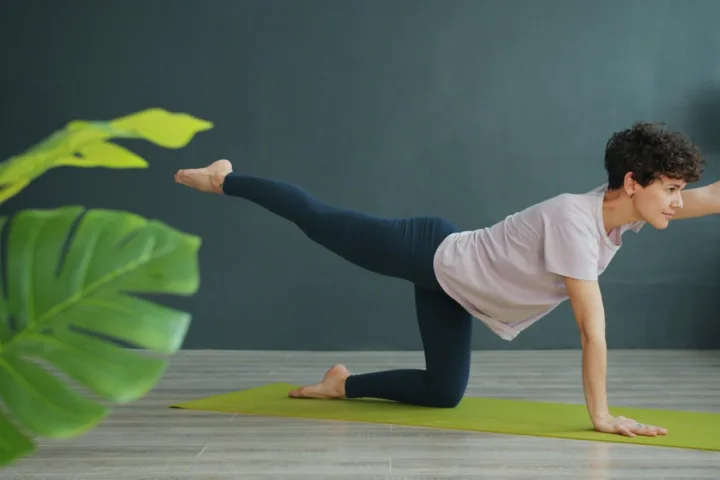

A gymnastics workout at home works best as conditioning, not tumbling. You train the strength, core control, balance, and flexibility that gymnastics is built on, plus a few low, controlled basics on a mat, and you leave flips, handsprings, and new aerial skills for a supervised gym. That approach gives beginners a real workout in 30 to 40 minutes, 2 to 3 times a week, with no apparatus.
After 4 to 6 weeks of that work, most healthy beginners notice the practical payoffs first: a steadier handstand line against a wall, a cleaner forward roll, better landing control, and less wobbling in balance drills.
What a Gymnastics Workout at Home Should and Should Not Include
A home session should include bodyweight strength, hollow and arch core work, balance, gentle flexibility, and progressions you can stop safely at any point.
It should not include back handsprings, front or back flips, aerial cartwheels, or skills you have only seen in a video. Boston Children's Hospital advises gymnasts not to attempt complicated skills until they are strong, fit, and skilled enough to practice them safely, because harder skills require more strength and carry a higher chance of injury.
The dividing line is simple: if a fall from the skill could land you on your head, neck, or back, it does not belong at home.
That rule still leaves plenty to train. Gymnastics conditioning is demanding because it uses straight arms, a tight core, pointed control through the legs, and full-body tension, not just reps for one muscle group.
Children's Colorado makes the same point for new skills: build up gradually with drills and progressions first, work with a coach or spotter, use a soft training surface, and save new skills for the gym, even if you have some equipment at home. For children training at home, that means an adult present for the whole session, not in another room.
Set Up a Safe Space Before You Start
You need a clear, flat area, a mat on a non-slip floor, and nothing hard or sharp within falling distance.
Clear at least 2 metres (about 6.5 feet) around your mat in every direction you might roll, kick, or step out. Move coffee tables, chairs, and toys out of that space. Practice on padded flooring, never on a hard surface, and make sure mats are secure so they will not slide, as KidsHealth advises for gymnastics practice.
| Check | Safe choice | Skip the session or move if |
|---|---|---|
| Surface | Gymnastics or thick exercise mat on flat floor | Bare tile, concrete, or a thin yoga mat for rolls and handstand work |
| Space | Clear floor and a clear wall for wall handstands | Furniture, doors, or other people in the landing area |
| Clothing | Close-fitting clothes, bare feet or grip socks, hair tied back, no jewellery | Loose sleeves that catch, socks on a slippery floor |
| Supervision | Adult present for children; another adult nearby for wall handstands when you are new | No one knows you are practising inverted skills |
Safety note for this topic: stop and do not push through sharp pain, wrist pain that lingers to the next day, neck pain, back pain, dizziness, or numbness. Gymnasts load the wrists heavily when they walk and jump on their hands, and the American Academy of Pediatrics notes Warm Up for 8 Minutes, Every Time
A warm-up raises temperature first, then prepares wrists, shoulders, ankles, and hips for the positions you will use. Boston Children's recommends warming up before every practice, with light aerobic work, stretching, and gymnastics basics that focus on proper form. Cold, rushed wrist and shoulder work is a common reason home practice goes wrong, because handstands and rolls load joints that desk work leaves stiff. If your wrists cannot bear weight comfortably in the warm-up, replace handstand and roll work that day with core, leg, and balance work. That decision prevents a minor ache from becoming the reason you stop training altogether. Do this circuit as straight sets with 45 to 60 seconds of rest between sets. Quality stops a set, not a target number, so end a set when your form breaks, your arms bend in a straight-arm drill, or your lower back arches hard in core work. For general muscle strengthening, the CDC recommends working all major muscle groups at least 2 days a week, doing activities to the point where another repetition would be hard, at 8 to 12 repetitions per set, for at least 1 set and 2 to 3 sets for more benefit. Holds in this plan use time instead of reps, but the same rule applies: the last seconds should feel hard while your position stays clean. The hollow body is a tucked, rounded-back core position that underpins rolls, handstands, and landings. Lie on your back, lower ribs pressed down, lower back lightly into the mat, arms by your ears and legs straight and low, for 15 to 30 seconds. If your lower back lifts, bend your knees or raise your legs higher. Do 3 holds. On alternate days, replace one hold with 8 slow dead bugs per side, reaching the opposite arm and leg away without arching. The arch hold trains the back side of the body that balances hollow work. Lie face down, legs together, and lift your chest, arms, and thighs a few centimetres for 10 to 20 seconds. Keep your neck neutral and squeeze your glutes. Do 3 holds. Keep the lift small because a large, forced back bend adds spinal load without adding useful control for beginners. Straight-arm support is the strength base for cartwheels and handstands, so you build it in stages. Choose the push-up level you can do for 8 to 12 clean reps: wall, hands on a sturdy counter, knees, or full floor push-ups. Do 2 to 3 sets. Then, only if your wrists and shoulders felt fine, do a chest-to-wall handstand hold. Walk your feet up a clear wall from a plank, hands 15 to 30 cm (6 to 12 inches) from the wall, until your body is as vertical as you can control. Hold 10 to 20 seconds, walk down, and rest. Do 3 holds. Keep a clear exit: always walk down or turn out to the side you practised, never try to roll out of a wall handstand you have not been taught in person. Leg strength controls jumps and landings, which is where ankles and knees take force. Do 2 to 3 sets of 8 to 12 bodyweight squats, then 6 to 8 supported reverse lunges per leg, holding a wall or sturdy chair for balance. The NHS strength guidance uses the same pattern at home: choose a solid, stable chair without wheels, keep feet flat, build up slowly, and gradually increase repetitions over time. Finish with 6 low landing drills: hop a few centimetres up, land on both feet with knees tracking over toes, hips back, and hold still for 2 seconds. No height, no twist. A quiet, stuck landing is the goal, because control on landing matters more than jump height for a beginner. A bridge builds shoulder and upper-back mobility and arm support, but it is optional. Lie on your back, feet flat and hands by your ears with fingers pointing toward your shoulders. Press up only as far as you can breathe comfortably, for 5 to 10 seconds, and lower slowly. Do 2 to 3 holds. Skip it if you have back, shoulder, or wrist pain, or if you cannot press up without holding your breath and forcing your lower back. A glute bridge, lifting only your hips with your back on the floor, is a safer substitute for most beginners. Balance in gymnastics is active, not still, so you practise correcting small shifts without stepping off. Put a line of tape on your mat. Walk forward heel-to-toe for 10 steps, turn carefully, and walk back. Then stand on one leg for 20 seconds per side, near a wall. Do 2 rounds. Keep your standing knee soft and your hips level. If you wobble early, that is useful training, provided you can step off safely onto the mat. Pick only the progressions that match your warm-up and strength that day. Forward roll, on a mat only: squat, hands on the mat shoulder-width apart, chin tucked to your chest, and roll over a rounded upper back, not over the top of your head. Push with your legs, keep knees tucked, and stand up without using your hands if you can. Do 4 to 6 rolls with rest between them. Do not do backward rolls at home as a beginner, because they load the neck in a way that is hard to self-check. Cartwheel over a line: start only if you can hold a wall handstand hold comfortably and support your weight on straight arms. Stand sideways to your tape line in a lunge, place hand, hand, foot, foot across the line in sequence, with legs wide. Do 4 attempts per side at most, and stop when your arms start to bend or your landings get sloppy. Fatigue is a stop signal, not a test. Cool down for 3 to 5 minutes with easy breathing, a gentle hamstring and hip flexor stretch, a chest stretch, and wrist circles. Flexibility work belongs here and in the warm-up in small doses, not as forced end-range pushing when you are tired. Two full sessions plus one short flexibility and balance session fit the general activity target without daily tumbling stress. The WHO recommends adults do at least 150 to 300 minutes of moderate-intensity aerobic activity or 75 to 150 minutes of vigorous activity per week, plus muscle-strengthening activities involving all major muscle groups on 2 or more days a week. Walking, cycling, or other aerobic work on the other days counts toward that total. This gymnastics plan covers the strengthening part, not the whole aerobic target on its own. Take at least one full rest day each week. Boston Children's notes taking time off every week helps the body recover, and constant repetitive training raises injury risk. Progress only one thing at a time: add 5 seconds to a hold, add 1 to 2 reps, or add a third set, and only after you completed the previous level twice with clean form and no pain the next day. Most home problems come from skipping stages, not from a lack of talent. If a move hurts in the same spot for a week, remove it, keep the pain-free parts of training, and seek medical advice if it affects daily activity or does not settle with rest. Yes, for conditioning, balance, flexibility, and basic floor progressions. You can build a useful base at home, but advanced tumbling, apparatus work, and any skill where you rotate in the air need a gym and a coach. No. A mat, clear floor, and a clear wall cover this entire plan. Home trampolines and improvised bars add risk without adding a safe way to learn the skills they are sold for, and they are not a substitute for maintained apparatus and supervision. There is no safe timeline to promise. Move away from the wall only after you can hold a chest-to-wall hold for 30 seconds with straight arms, exit reliably every time, and ideally after a coach has checked your line and bail-out in person. It can be, for conditioning and supervised basics on a mat, with an adult present and no flips or new skills. Children should stop if they feel pain and tell an adult, and new skills should be saved for a supervised class, as children's hospitals that publish gymnastics guidance advise. Your wrists are taking your full body weight through a bent-back position they may not be prepared for. Shorten the holds, add more warm-up time, spread your fingers wide, and build up over weeks. Persistent, swollen, or one-sided wrist pain needs medical review, not more loading. This guide is based on the WHO physical activity recommendations, the CDC guidance on what counts as muscle-strengthening activity, and gymnastics injury-prevention guidance from Boston Children's Hospital, Children's Colorado, KidsHealth, and the American Academy of Pediatrics linked above. It does not claim testing, coaching credentials, or expert review.The 30- to 40-Minute Gymnastics Workout at Home
1. Hollow body hold and dead bug
2. Arch hold, kept small
3. Push-up progression and wall handstand hold
4. Squat, supported lunge, and landing drill
5. Bridge, only with clear limits
6. Balance line work
7. Two basic skills, with progressions
A Simple Weekly Plan
Day Session Time Monday Full workout above: core, support, legs, balance, basic skills 30 to 40 minutes Tuesday Walk or other moderate activity, plus 10 minutes of gentle flexibility 20 to 40 minutes Thursday Full workout, swapping dead bug for hollow hold emphasis and adding one extra landing set if form stayed clean 30 to 40 minutes Saturday (optional) Balance line work, wall handstand holds, flexibility, no rolls if wrists or neck feel tired 15 to 20 minutes Other days Rest or easy walking — Mistakes That Stall Progress or Cause Pain
Home Gymnastics Questions, Answered Straight
Can I learn gymnastics at home as an adult beginner?
Do I need a beam, bars, or a trampoline at home?
How long before I can do a handstand away from the wall?
Is a gymnastics workout at home safe for children?
Why do my wrists hurt during handstand holds?
Related Home Workouts
How This Guide Was Put Together
Sources